
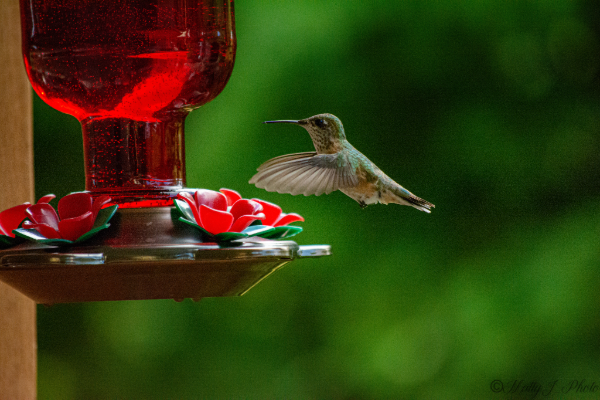
How to Clean Your Hummingbird Feeder in Minutes
Keeping your hummingbird feeder clean is essential for the health and safety of these tiny, vibrant birds. Dirty feeders can attract mold, bacteria, and other harmful substances that may pose risks to hummingbirds. Fortunately, cleaning your feeder doesn’t have to be a time-consuming chore. With the right steps and materials, you can have it sparkling clean in just minutes, ensuring that your backyard visitors stay healthy and happy.
Why Cleaning Your Hummingbird Feeder Is Important
Hummingbirds are attracted to feeders filled with sugar water, but the sugary environment can quickly become a breeding ground for mold, yeast, and bacteria if not properly maintained. These microorganisms can harm hummingbirds by causing infections or even fatal illnesses. Additionally, if the feeder becomes clogged or dirty, it can discourage hummingbirds from visiting altogether. Regular cleaning prevents these issues and helps maintain a continuous flow of fresh nectar.
What You’ll Need to Clean Your Feeder Quickly
Before you start, gather the following supplies to streamline the cleaning process:

- Warm water
- Mild dish soap (optional)
- White vinegar or a teaspoon of baking soda (natural cleaning agents)
- A small bottle brush or toothbrush
- Clean cloth or paper towels
- Drying rack or clean towel
Having these on hand means you won’t waste time searching for anything midway through the task.
Step-by-Step Guide to Clean Your Hummingbird Feeder in Minutes
1. Disassemble the Feeder
Start by taking apart your feeder completely. Remove all parts, including the reservoir, feeding ports, and any detachable flowers or perches. Disassembling the feeder ensures you reach every nook and cranny where mold and residue may accumulate.
2. Rinse with Warm Water
Rinse each part under warm running water to remove any leftover nectar and debris. This quick rinse softens residues, making the next cleaning steps more effective.
3. Scrub Using a Bottle Brush or Toothbrush
Dip your bottle brush or toothbrush into warm water mixed with a little mild dish soap or white vinegar. Scrub every surface, focusing especially on the feeding ports and tight corners where residue builds up. The bottle brush is perfect for cleaning the reservoir, while the toothbrush works well for smaller parts.
Tip: If you prefer not to use soap, a natural cleaning solution like white vinegar or baking soda dissolved in water is just as effective in removing mold and sticky nectar.
4. Rinse Thoroughly
After scrubbing, rinse all parts thoroughly to ensure no soap or vinegar residues remain. Any leftover cleaning agent can contaminate the nectar and deter hummingbirds.
5. Dry Completely
Shake off excess water and place the parts on a drying rack or a clean towel. Allow them to air dry completely before reassembling the feeder. This helps prevent mold growth during storage and keeps your nectar fresh.
Tips for Maintaining a Clean Feeder Year-Round
- Clean your feeder at least once a week: Increase to twice a week during hot weather, as warm temperatures promote faster microbial growth.
- Change nectar frequently: Replace the sugar water every 3–4 days to maintain freshness.
- Use a homemade nectar recipe: Stick to the simple ratio of four parts water to one part white granulated sugar — avoid honey, artificial sweeteners, or red dye.
- Store feeders properly during off-season: If you’re not using the feeder, clean it thoroughly and store it in a dry place to prevent mold buildup.
Quick Cleaning Hacks for Busy Gardeners
If you’re short on time, here are some shortcuts that let you clean your feeder in even less time:
- Use a dishwasher: Check if your feeder parts are dishwasher-safe. If so, run them through a quick cycle to sanitize without scrubbing.
- Soak overnight: For stubborn mold or residue, soak parts in a white vinegar solution overnight to loosen buildup before quick scrubbing.
- Keep a spare feeder: Having a backup allows you to swap feeders instantly, giving you time to clean the dirty one without missing hummingbird visits.
Conclusion
Cleaning your hummingbird feeder need not be a laborious task. With just a few simple tools and a little effort, you can have a sparkling clean feeder ready in minutes. A clean feeder not only safeguards the health of your precious hummingbirds but also keeps them coming back to enjoy your garden’s nectar. By incorporating these quick cleaning habits into your routine, you’ll enjoy watching these fascinating birds thrive all season long.